Some of the tomatoes were ripe and ready to eat.
But I had more red, ripe tomatoes than I could consume in salads the next few days, but not quite enough for lazy me to go through the canning process for a small batch of tomatoes.
(I also have quite enough canned to last me through the winter months.)
 Then, I remembered that I had seen a segment on Gourmet Magazine TV: Diary of a Foodie, that aired on my PBS station last Sunday. A recipe that was featuerd was an ingenious method to make tomato powder.
I was intrigued.
This recipe seemed like a perfect solution to preserve the tomatoes that I had just harvested.
I had to try this method…!
And try I did... and it was a simple, fabulous, and a very different way to use tomatoes in a recipe
So I will to share my new-found kitchen magic with all of you, my dear blog readers. tomato powder
(recipe adapted from Gourmet Magazine TV: Diary of a Foodie, Season Two: The Inventors.)
ingredients
ripe tomatoes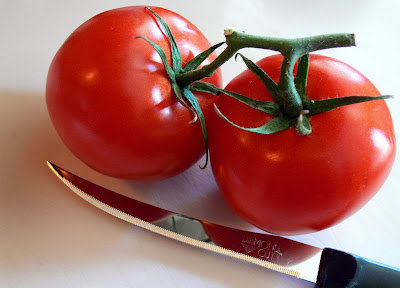 directions
In a sheetpan, place a non-stick liner (such as a Silpat mat).
Preheat oven to 175ºF with rack placed in the center of the oven.
Cut the tomatoes crosswise into 1/8-inch-thick slices and arrange in a single layer on the non-stick mat.
Dry the tomato slices in oven, turning over once, until completely dehydrated and crisp. In my temperamental oven, the drying time took 5 hours.
It make take a bit less so watch carefully near about the 4 hour mark.
I did not mind being a ”tomato sentry” for an hour as the gentle warmth of the stove was welcomed as I sat in my kitchen nook, watched the first dusting of wet snow out the window, read emails and wrote a blog post for another day. When all the tomato slices felt crisp and crumbly to the touch, I moved the silpat off the warm sheet pan and set it on the counter to let the dried tomato slices cool throughly.
 When cool, crumble the tomato slices into an electric coffee/spice grinder.
Grind to a fine powder.
Transfer the ground essence from the grinder to a fine-mesh sieve set over a bowl.
Use a wooden or metal spoon to push powder through sieve.
Discard any pieces or seeds that remain. Each 8 ounces of fresh tomatoes that I dried, (2 medium tomatoes),
yielded about 2 Tablespoons of the bright and intensely flavored Tomato Powder. In an airtight container at room temperature, this tomato powder keeps indefinitely.
I stored mine in an old French jam jar with a rubber seal.
This rich tasting Tomato Powder is delicious tossed with garlic-buttered pasta or sprinkled over a fresh green salad that has been dressed with a vinegarette.
*** *** *** *** *** *** *** *** *** *** *** *** *** *** *** *** *** *** *** *** ***
A Bonus Tuesday Tip:
Cleaning the Spice Grinder
I have small electric grinder that I reserve solely for spices and my home-dried herbs.
At present I use a 5 year-old Krups coffee grinder.
But whatever you have (and there are some great spiffy new models out there) it needs to be cleaned between uses.
After use, I tap the body of the grinder and dump the dregs, then I gently wipe with a barely damp cloth.
Then I grind two or three batches of plain inexpensive white rice to remove the remains of the spice that was ground. I find that this also effectively removes the aroma as well.
After I dispose of the last batch of ground rice, I wipe the cap and grinder interior with a slightly damp cloth (unplug FIRST please…! )
Let the grinder air dry, et viola..!
You now have a clean, fresh grinder without residue or odors for your next batch of your own personal blend of fresh spices.


 1/4 cup Sugar
 directions
 Meanwhile, in a medium bowl, beat the cream cheese and sugar at medium speed until smooth. Beat in the fromage blanc, then add the eggs and vanilla and beat until smooth.


 I put each batch of herbs into the microwave separately and nuke the batches at 20 second intervals on high checking for dryness to touch between each turn.

 The origin of Halloween dates back at least 3,000 years to the Celtic celebration of Samhain (pronounced sow-ain). The festival was held starting at sundown on October 31st and lasted until sundown on November 1st. It was similar to the modern practice of the New Years celebration.
 On this magical night, glowing jack-o-lanterns, carved from turnips or gourds, were set on porches and in windows to welcome deceased loved ones, but also to act as protection against malevolent spirits. Burning lumps of coal were used inside as a source of light, later to be replaced by candles.
 Samhain was not the name of a Lord of the Dead, no historical evidence has ever been found to back this up, it was simply the name of the festival and meant Summer's End.
 When European settlers, particularly the Irish, arrived in America they found the native pumpkin to be larger, easier to carve and seemed the perfect choice for jack-o-lanterns. Halloween didn't really catch on big in this country until the late 1800's and has been celebrated in many ways ever since.
 The Rouge Vif d'Estampes is bright red French pumpkin,
 We fancy that we are individuals; so are pumpkins.
 But this day was different, I was going to Graue Mill to learn about edible history at the Cooking with Cast Iron demonstration given by Chef Ian Rittof.
 As I rounded the corner of the Mill house, I saw an outdoor kitchen set in the small clearing not far from the entrance to the mill house and museum.
 Chef Ian was simultaneously serving a fresh from the cast iron pot corn bread, stirring his soup and tasting it to adjust the seasonings and fielding questions from the audience that eagerly were sampling the warm cornbread.
 Prior to adding the batter to the cast iron pot, (for the purpose of expedience, I imagine) he sprayed the pot well with a non-stick cooking spray.
 Rich golden batter was ladled into a heavy black kettle, placed on a bed of white hot coals, the heavy lid was placed firmly on the pot and more coals were layer over the lid.
 I asked Chef Ian what the cooking time would be for the bread in this method of open hearth baking and he state that it took about 20 – 30 minutes to achieve a crusty golden cornbread. According to the recipes that I have that is close to 425 degrees F in a conventional oven.
 Each ingredient note in this recipe, harmonized with the other to bring out the best in the other, like classical music and fine wine.
 The best way I can describe Chef Ian Rittof is a man with generous graceful unassuming artistry as a chef. He seems to love to feed people and make them feel welcome to eat the food he had prepared.
 Chef Ian quietly embodies one who truly loves what he does.
 Perhaps that is the reason all the recipes that he produced in cast iron vessels over a wood fire and under wood coals were mouth-watering.
 Frederick Graue opened the mill in 1852 on Salt Creek in what is now Oak Brook, Illinois. Graue Mill is the only operating waterwheel gristmill in Illinois.
 I paid a visit to Graue Mill for several hours the day before I was to photograph the Cooking with Cast Iron demo to check out the lighting at the exact site where the demo would be held.
 If you live nearby, it is worth a visit this month to tour the Mill and Museum and pick up a bag of corn meal and free delicious recipes.
 After visiting these historic buildings, I would highly suggest a walk on the trail running along Salt Creek into Fullersburg Woods to the nature center. It is comfortable half-mile walk. I love to take a picnic and sit admire (and photograph) the colorful fall foliage and equally colorful water fowl that make this picturesque spot their home.