The origin of Halloween dates back at least 3,000 years to the Celtic celebration of Samhain (pronounced
sow-ain). The festival was held starting at sundown on October 31st and lasted until sundown on November 1st. It was similar to the modern practice of the New Years celebration.

On this magical night, glowing jack-o-lanterns, carved from turnips or gourds, were set on porches and in windows to welcome deceased loved ones, but also to act as protection against malevolent spirits. Burning lumps of coal were used inside as a source of light, later to be replaced by candles.

Samhain was not the name of a
Lord of the Dead, no historical evidence has ever been found to back this up, it was simply the name of the festival and meant
Summer's End.
It was believed that the souls of the dead were closest to this world and was the best time to contact them to say good bye or ask for assistance. It was also a celebration of the harvest.
It is still treated as such today by those who practice Wicca or other nature based religions.
It has absolutely nothing to do with Satan, who was a creation of the Christian church.

When European settlers, particularly the Irish, arrived in America they found the native pumpkin to be larger, easier to carve and seemed the perfect choice for jack-o-lanterns. Halloween didn't really catch on big in this country until the late 1800's and has been celebrated in many ways ever since.

The
Rouge Vif d'Estampes is bright red French pumpkin,
which means vivid red. It is shaped looking like rather a red cheese wheel is deep red-orange, and heavily sutured.
The moderately sweet, orange flesh is suited for pumpkin or squash pie.
Also known as the Cinderella pumpkin, as it was the prototype for
Walt Disney’s Cinderella's pumpkin carriage...
A very old French heirloom, this was the most common pumpkin in the marché Les Halles or Central Market in Paris back in the 1880’s.
The flesh is tasty in pies or baked.
This one can also be picked small, like summer squash, and fried.
I love this one to carve as it has such an unusual bright orange and a lovely textured exterior that sets it apart from the other Jack-o-lanterns on the street…
This heirloom pumpkin as most has lovely green seeds that can be toasted and salted in the conventional manner.
I have
just once undertaken the laborious process of shelling raw pumpkin seeds for the following seasonal and yummy recipe that follows…yikes.
Since then I have purchased
raw pepitas no shell pumpkin seeds from this online source.
 Pumpkin Seed Brittle
(recipe courtesy of Alton Brown)
ingredients1 teaspoon vegetable oil, plus additional for coating
7 ounces hulled pumpkin seeds (these are the green ones)
1/2 teaspoon cayenne pepper
1/2 teaspoon ground cinnamon
1/2 teaspoon kosher salt
1 pound 6 ounces granulated sugar
12 ounces water
directionsPlace the oil and seeds into a 10-inch sauté pan and set over medium-high heat.
Toast the seeds while constantly moving the pan.
You will smell their aroma and hear some of them begin to crackle when they are toasted, 4 to 5 minutes. Transfer the seeds to a small mixing bowl, add the cayenne, cinnamon and salt and stir to combine.
Line a half sheet pan with a silicone (Silpat mat) baking mat.
Place a 3-quart saucier inside a large cast iron skillet.
Add the sugar and water to the saucepan, and cook over high heat, stirring occasionally with a wooden spoon, until it comes to a boil. Stop stirring, cover and cook for 3 minutes.
Uncover, reduce heat to medium, and cook until the sugar is a light amber color, approximately 25 minutes.
Remove from the heat and stir in the pumpkin seed mixture. This will greatly reduce the temperature of the sugar, so work quickly.
Once evenly mixed, pour the mixture onto the prepared half sheet pan.
Using an oiled spatula, spread thin over the silicone mat.
You will have to work quickly when pouring out and spreading the mixture in the pan.
Cool completely, approximately 30 minutes, and then break into pieces.
Store in an airtight container for up to 2 weeks (if it lasts that long…)
I package my Pumpkin Brittle in small candy bags for Halloween gifts for those little goblins that ring my bell on Halloween night.
 We fancy that we are individuals; so are pumpkins.
Every pumpkin in the field goes through every point of pumpkin history. ~ Ralph Waldo Emerson

 ...or any femme fantôme that floats down your lane...

 I came upon the set of ancient millstones or Buhrstones that have ground corn and other grains for decades. These beautiful and ancient buhrstones are set outside of Graue Mill as a reminder of times past and the work these mighty stones had done to nourish this community.
 In the past, these simple stones helped to feed the people of this community.
 tomato powder
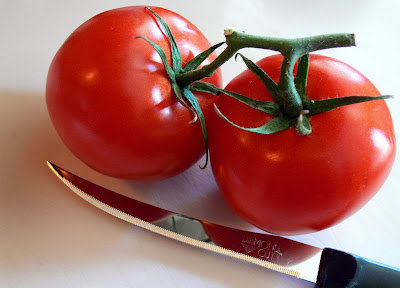 directions
 In my temperamental oven, the drying time took 5 hours.
 When all the tomato slices felt crisp and crumbly to the touch, I moved the silpat off the warm sheet pan and set it on the counter to let the dried tomato slices cool throughly.
 When cool, crumble the tomato slices into an electric coffee/spice grinder.
 Each 8 ounces of fresh tomatoes that I dried, (2 medium tomatoes),
 In an airtight container at room temperature, this tomato powder keeps indefinitely.

 1/4 cup Sugar
 directions
 Meanwhile, in a medium bowl, beat the cream cheese and sugar at medium speed until smooth. Beat in the fromage blanc, then add the eggs and vanilla and beat until smooth.


 I put each batch of herbs into the microwave separately and nuke the batches at 20 second intervals on high checking for dryness to touch between each turn.


 But this day was different, I was going to Graue Mill to learn about edible history at the Cooking with Cast Iron demonstration given by Chef Ian Rittof.
 As I rounded the corner of the Mill house, I saw an outdoor kitchen set in the small clearing not far from the entrance to the mill house and museum.
 Chef Ian was simultaneously serving a fresh from the cast iron pot corn bread, stirring his soup and tasting it to adjust the seasonings and fielding questions from the audience that eagerly were sampling the warm cornbread.
 Prior to adding the batter to the cast iron pot, (for the purpose of expedience, I imagine) he sprayed the pot well with a non-stick cooking spray.
 Rich golden batter was ladled into a heavy black kettle, placed on a bed of white hot coals, the heavy lid was placed firmly on the pot and more coals were layer over the lid.
 I asked Chef Ian what the cooking time would be for the bread in this method of open hearth baking and he state that it took about 20 – 30 minutes to achieve a crusty golden cornbread. According to the recipes that I have that is close to 425 degrees F in a conventional oven.
 Each ingredient note in this recipe, harmonized with the other to bring out the best in the other, like classical music and fine wine.
 The best way I can describe Chef Ian Rittof is a man with generous graceful unassuming artistry as a chef. He seems to love to feed people and make them feel welcome to eat the food he had prepared.
 Chef Ian quietly embodies one who truly loves what he does.
 Perhaps that is the reason all the recipes that he produced in cast iron vessels over a wood fire and under wood coals were mouth-watering.
 Frederick Graue opened the mill in 1852 on Salt Creek in what is now Oak Brook, Illinois. Graue Mill is the only operating waterwheel gristmill in Illinois.
 I paid a visit to Graue Mill for several hours the day before I was to photograph the Cooking with Cast Iron demo to check out the lighting at the exact site where the demo would be held.
 If you live nearby, it is worth a visit this month to tour the Mill and Museum and pick up a bag of corn meal and free delicious recipes.
 After visiting these historic buildings, I would highly suggest a walk on the trail running along Salt Creek into Fullersburg Woods to the nature center. It is comfortable half-mile walk. I love to take a picnic and sit admire (and photograph) the colorful fall foliage and equally colorful water fowl that make this picturesque spot their home.